With the release of Neuron ESB version 3.5.3 (CU3) we now have connectivity to SAP! The Neuron ESB Connector for SAP is integrated with our new Schema Generation Wizard which allows you easily browse the SAP metadata library, select which functions or IDocs you want to integrate with, download schemas and generate sample XML documents. With the SAP Connector you can call BAPIs, RFCs and send or receive IDocs. More features will be coming in the near future! This blog post is the first in a four-part series that will walk you through an and-to-end integration with SAP. In Part 1 we walk you through the connector setup and the new Schema Generation Wizard to import schemas and XML samples from SAP! Part 2 will show you how to call BAPIs and RFCs. Parts 3 and 4 will walk you through receiving and sending IDocs.
Using the Neuron ESB SAP Connector – Part 2: Executing BAPIs and RFCs
Using the Neuron ESB SAP Connector – Part 3: Receiving IDocs
Using the Neuron ESB SAP Connector – Part 4: Sending IDocs
Prerequisites
- Neuron ESB 3.5.3 or later (or Neuron 3.5.x with CU3 or later applied)
- SAP R/3 Version 4.0B and later versions or SAP ECC
- Either the SAP GUI Installed or librfc32.dll installed (see below)
- Port 33nn has to be opened where nn = System Number of the SAP system
Installation of librfc32.dll
Before using the SAP Connector, SAP’s librfc32.dll library needs to be copied to the Windows folder. This is automatically done for you when you install the SAP GUI. However, if you do not have the SAP GUI installed, you need to download and copy these files manually. Librfc32.dll can be downloaded from here:
On 32-bit Windows:
- Copy the 32-bit version of librfc32.dll to <windows>System32
On 64-bit Windows:
- Copy the 64-bit version of librfc32.dll to <windows>System32 (yes, 64-bit library in System32…)
- Copy the 32-bit version of librfc32.dll to <windows>SysWOW64 (yes, 32-bit library in SysWOW64…)
Create a Neuron Solution
Note – the starter solution created in this section can be found here SAPConnectorESB.zip
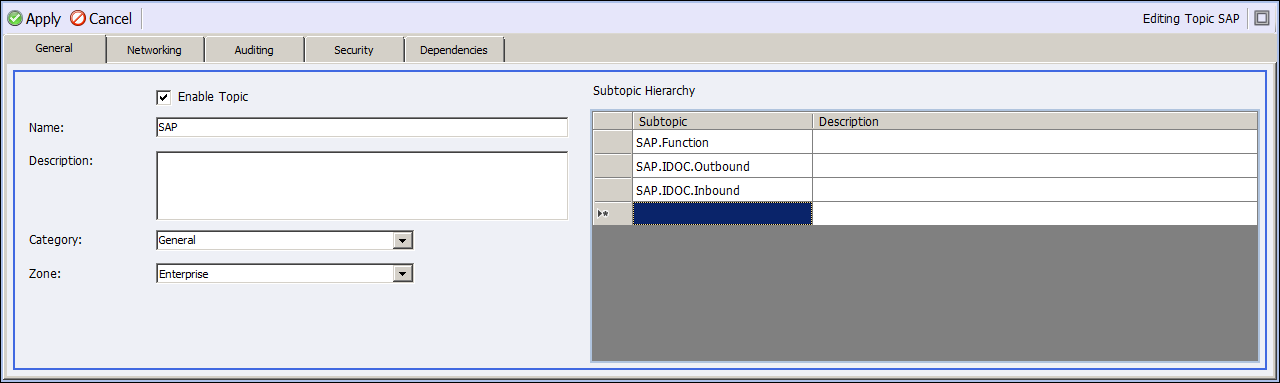
Open Neuron ESB Explorer are create a new solution. Add these entities to the solution:
- Topics:
- SAP
- SAP.Function
- SAP.IDOC.Outbound
- SAP.IDOC.Inbound
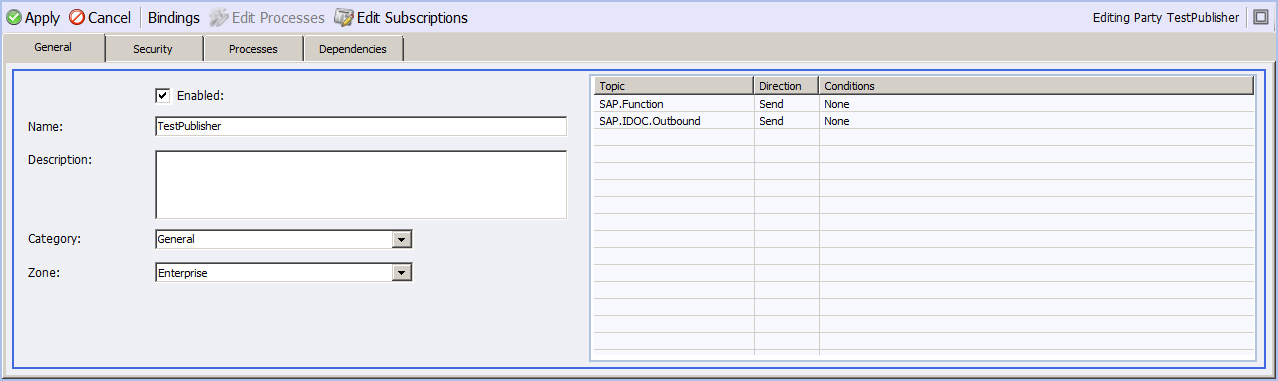
- Publishers:
- TestPublisher (add Subscriptions with Send permissions to SAP.Function and SAP.IDOC.Outbound)
- IDOCPublisher (add a Subscription with Send permissions to SAP.IDOC.Inbound)

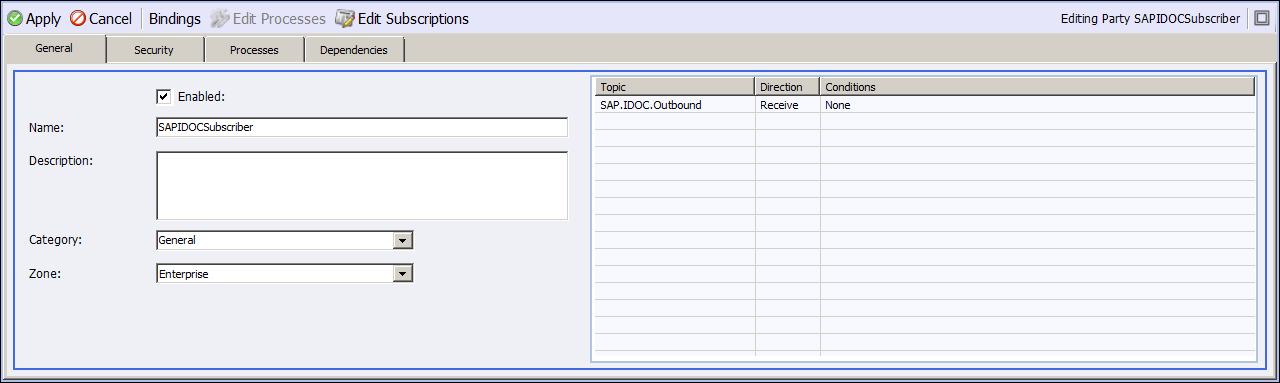
- Subscribers:
- SAPFunctionSubscriber (add a Subscription with Receive permissions to SAP.Function)

- SAPIDOCSubscriber (add a Subscription with Receive permissions to SAP.IDOC.Outbound)
- TestSubscriber (add a Subscription with Receive permissions to SAP.IDOC.Inbound)

- Save the Neuron ESB solution and configure the Neuron ESB runtime to host the solution.
Registering the SAP Connector
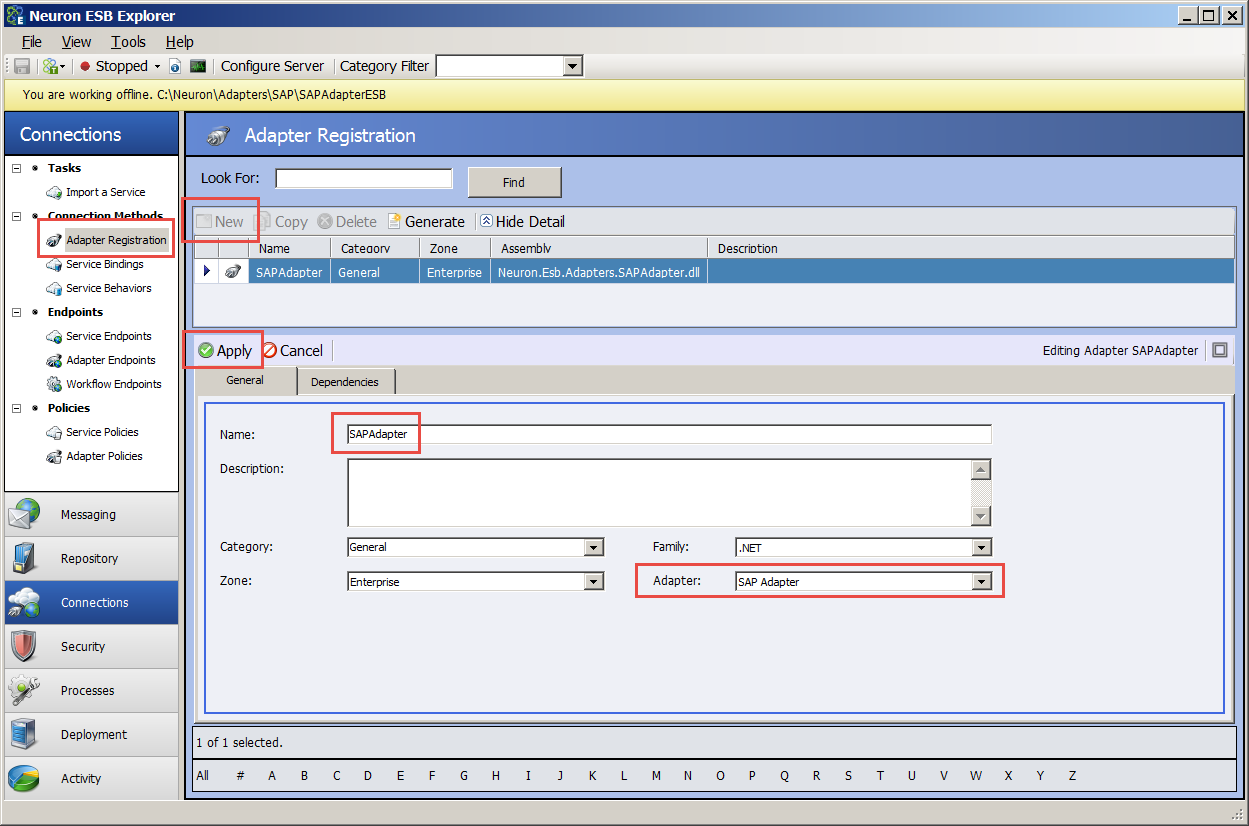
Before you can create an connector endpoint you need to register the SAP Connector in your Neuron solution. To register the connector:
- In Neuron ESB Explorer, navigate to Connections->Connector Registration and click the New button
- Set the Name of the connector to SAPConnector
- Select SAP Connector from the Connector dropdown list
- Click the Apply button:
Creating an SAP Connector Endpoint
An Connector Endpoint allows you to execute BAPIs or RFCs on SAP, as well as send or receive IDOCs. To create an SAP Connector endpoint:
- In Neuron ESB Explorer, navigate to Connections->Connector Endpoints and click the New button
- Set the Name of the Connector Endpoint to SAPFunctionEndpoint. This Connector Endpoint will be used to execute BAPIs and RFCs on SAP
- Set the Party Id to SAPFunctionSubscriber
- Set the Connector to SAPConnector
- Set the Mode to SolicitResponse:

- Click on the Properties tab
- Under the category “Connection” set the properties necessary for connecting to SAP:
| Type | The client connection type:A: An application-host based connection in which the connection specifies an application server through which the SAP Connector connects to SAP.M: A load balanced connection in which the connection specifies a message server through which the SAP Connector connects to SAP. |
| Client | The SAP system client ID (i.e. 800) |
| Language | The language code to use when connecting to SAP (i.e. EN) |
| Host | The name of the application server or a router string (i.e. mysapserver or /H/router.mycompany.com/H/mysapserver |
| System Number | The system number of the SAP system (i.e. 00) |
| Gateway Host | Specifies the name of an optional gateway host in an application host-based connection |
| Gateway Service | Specifies the name of an optional gateway service in an application host-based connection |
| Program ID | Specifies the program id for an RFC server connection (required for receiving IDOCs) |
| Message Server | Specifies the name of an optional message service in a load balancing connection |
| Group | Specifies an optional group of application servers in a load balancing connection |
| SID | The SAP System ID (i.e. NID) |
| Username | The user name on the SAP system |
| Password | The password for the user on the SAP system |
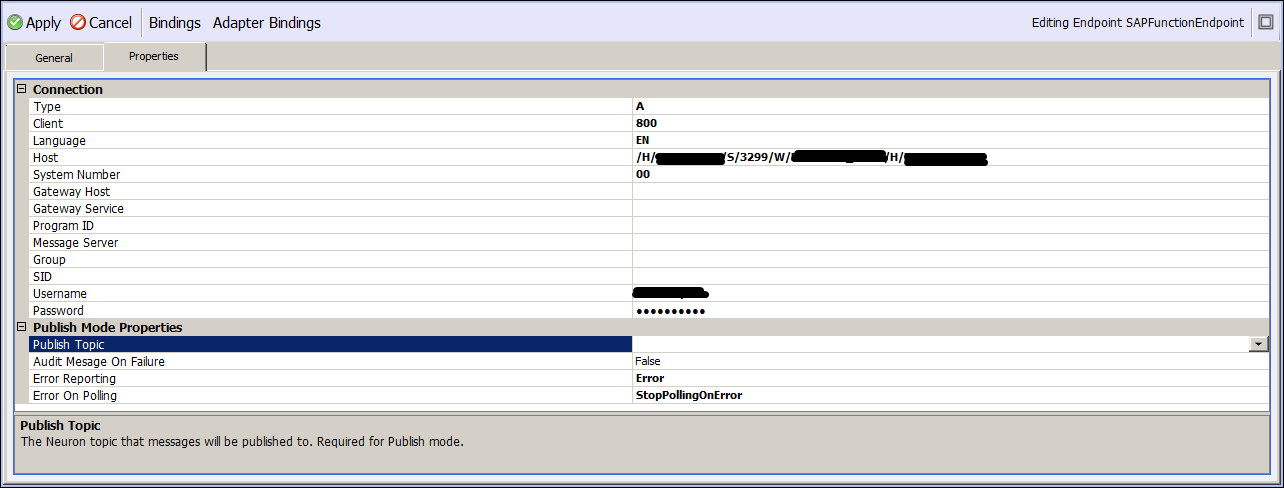
- Click the Apply button, then save the Neuron project
Generating Schemas for the SAP Connector
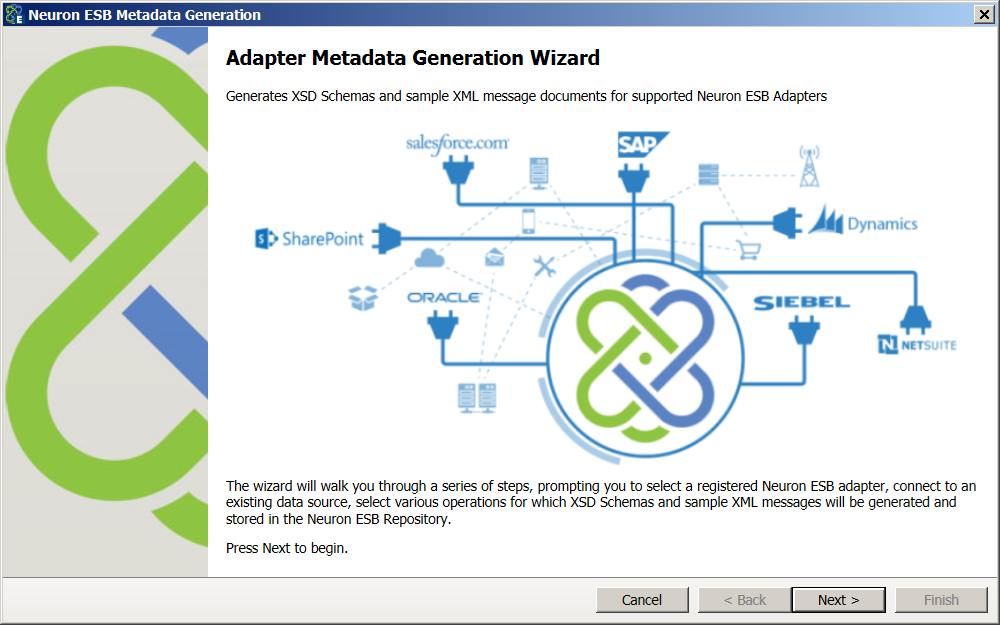
At this point your Neuron ESB solution is configured to execute BAPIs or RFCs on SAP. Before you can execute any of these functions, you need to construct the correct messages to send to SAP. The easiest way to do this is to generate schemas that represent the request and response messages and to generate XML samples from those schemas. Neuron ESB provides a Schema Generation Wizard that performs both of these tasks for you. With the Wizard you can connect to SAP, browse the functions and IDOCs you want to integrate with SAP, select which operations you want to execute and generate the schemas and sample XML messages.
To generate schemas and sample XML messages:
- In Neuron ESB Explorer, navigate to Repository->XML Schemas and click the Generate button:

- The Neuron ESB Metadata Schema Generation Wizard will start. Click Next:
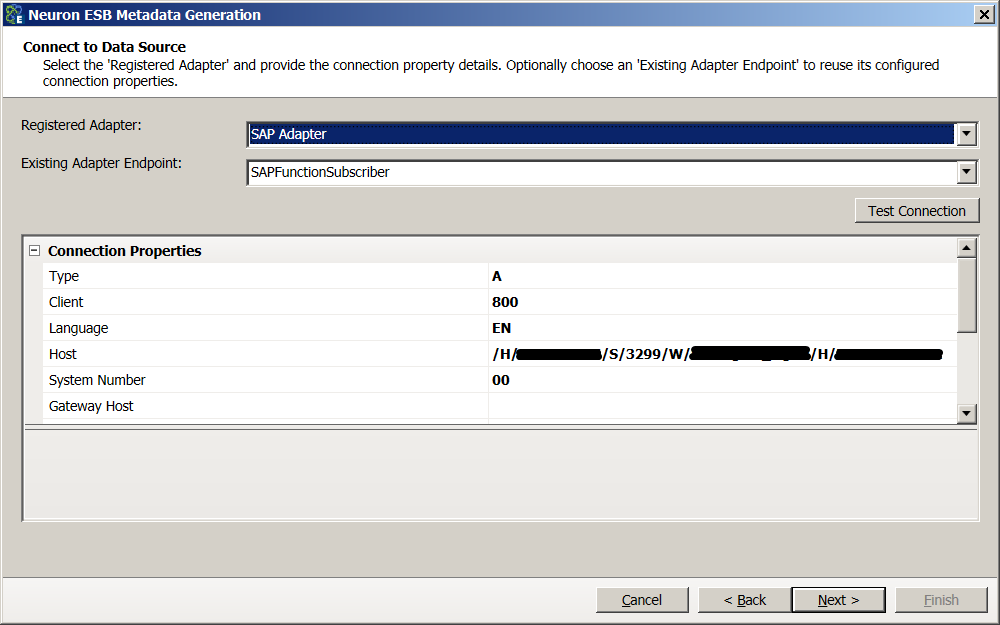
- On the Connect to Data Source page you select which connector you want to generate metadata for, and then you can either manually enter the connection properties or select an existing Connector Endpoint that already has them set. In the Registered Connector dropdown list, select SAP Connector and in the Existing Connector Endpoint dropdown list, select SAPFunctionSubscriber. You can test the connection to SAP by clicking the Test Connection button. Click Next:
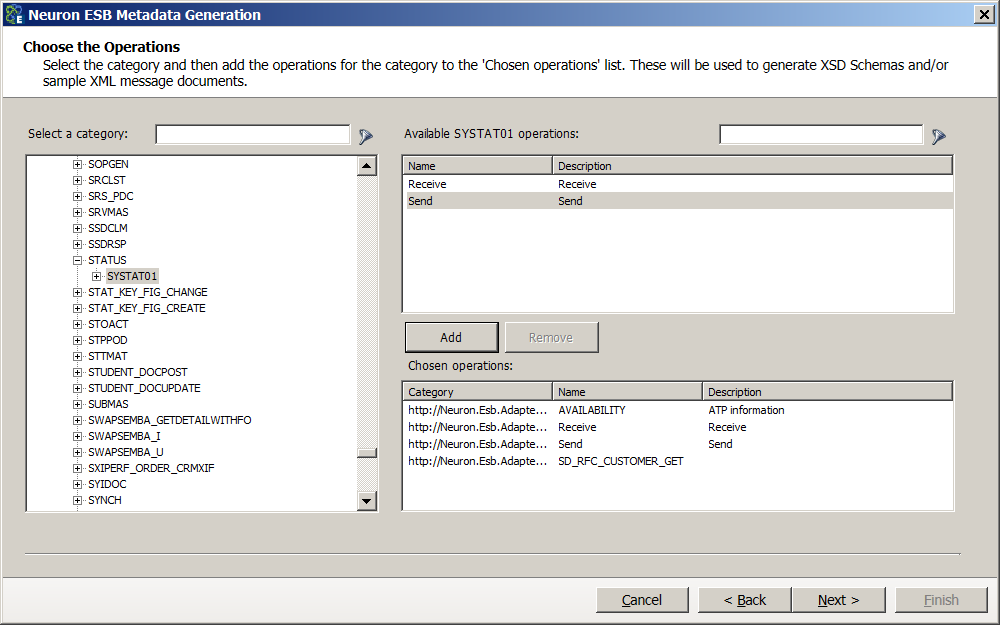
- On the Choose the Operations page you can browse for the functions you want to execute on SAP. You’re going to add metadata for 4 different operations.
- First, in the Select a Category tree, expand BAPI->Logistics – General->Logistics Basic Data->Material Master and select the Material node.
- In the Available Material Operations list, select Availability and then click the Add button to add it to the list of Chosen Operations:
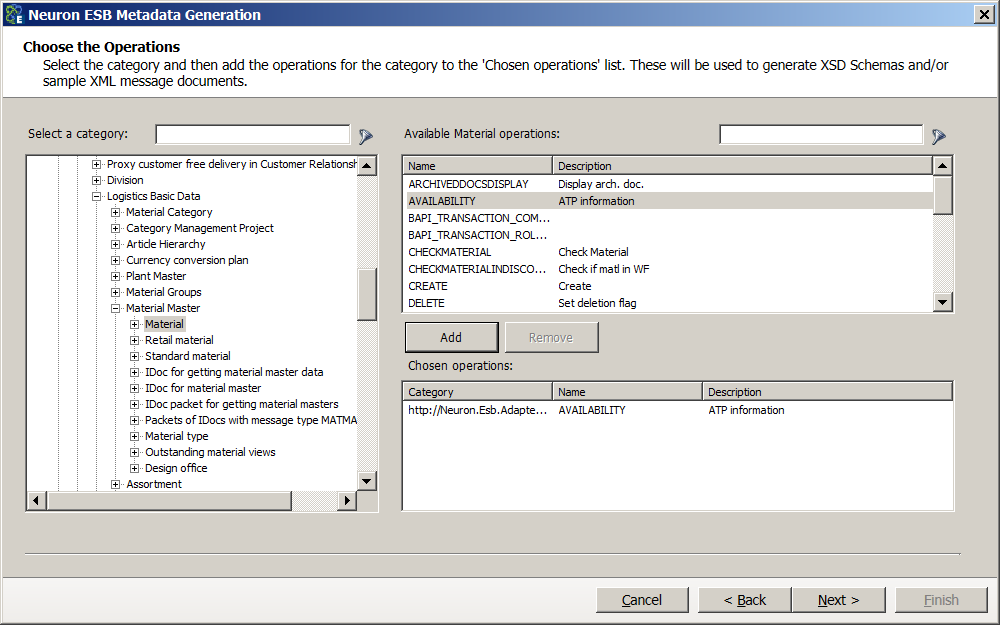
- Repeat steps 5 & 6 for these operations:
- Expand RFC and select the Sales node. Select the operation SD_RFC_CUSTOMER_GET and click Add.
- Expand IDOC->MATMAS and select the MATMAS05 node. Select the operation Receive and click Add.
- Expand IDOC->STATUS and select the SYSTAT01 node. Select the operation Send and click Add.
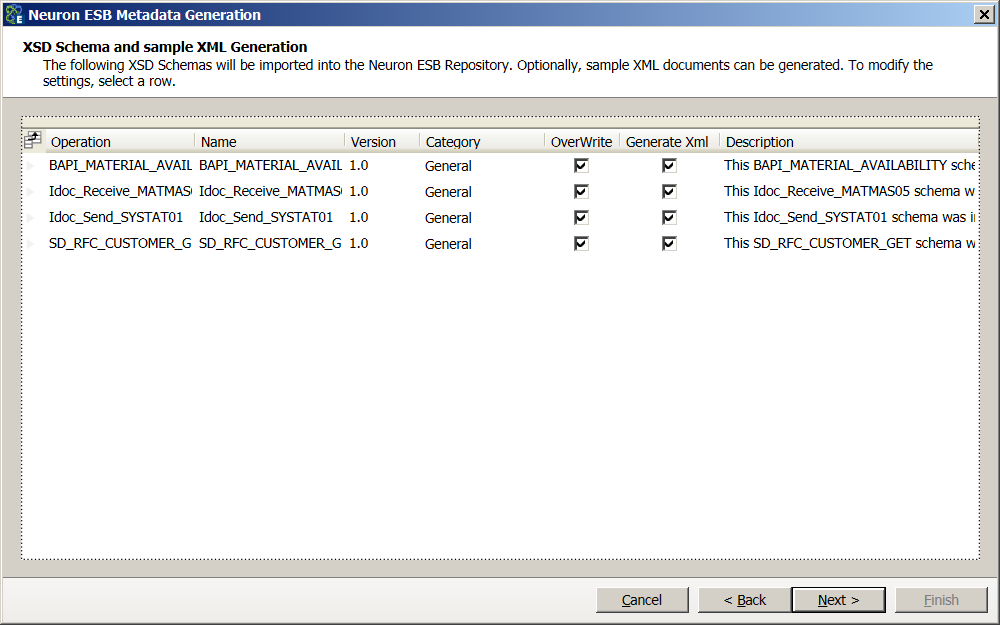
- Click Next. It may take a little bit before the next page appears due to retrieving metadata for four different operations. Review the XSD Schema and sample XML Generation page and click Next:
- The Summary page will display all of the documents that will be added to the XML Schemas and XML Documents repositories. Click Finish:
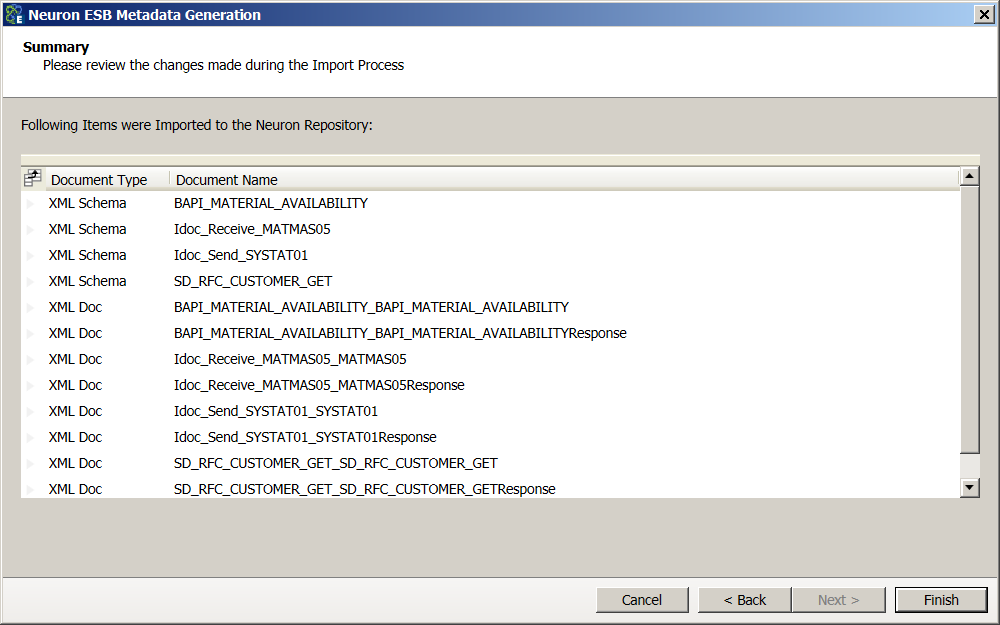
- Review the schemas in the XML Schemas repository and the XML Documents library.
- Save your solution!
To see how to call BAPIs and RFCs on SAP, check out the second part to this series – Using the Neuron ESB SAP Connector – Part 2: Executing BAPIs and RFCs
About the Author
Joe Klug is a Solution Architect for Peregrine Connect, responsible for pre-sales engineering, post-sales support, training, architectural reviews, product development and consulting. Prior to joining the team, he spent a number of years at Microsoft.
Read more about Peregrine Connect

-
Rabbit MQ Topics
Introduction Due to the open-source nature of RabbitMQ and constant updates, it is...
-
Port Sharing
One of Neuron ESB’s scalability features is the ability to install multiple...

-
The Integration Journey to...
The Integration Journey to Digital Transformation with Peregrine Connect
-
Saving Time and Money by...
Neuron ESB Application Integration and Web Service Platform: A Real-World Example...

-
Neo PLM
-
Loomis Case Study
Loomis Chooses Peregrine Connect as Their No/Low-Code Integration Platform:...

-

Decision Test Data Mapping
- Use decisions to drive the execution of...
-
Map Testing
Learn how to utilize FlightPath's testing functions...