This is Part 3 of the four-part series on using the new Neuron ESB SAP Connector. In Part 1 we showed you how to set-up the SAP Connector and then use it for importing schemas based on SAP BAPIs, RFCs and IDocs and generating sample XML documents based on those schemas. In Part 2 we showed you how to call BAPIs and RFCs. In this post we will walk you through receiving the Material Master IDoc. The steps here require you to have completed the steps in Part 1 of the series.
Using the Neuron ESB SAP Connector – Part 1: Setup and Schema Generation
Using the Neuron ESB SAP Connector – Part 2: Executing BAPIs and RFCs
Using the Neuron ESB SAP Connector – Part 4: Sending IDocs
Setting-up an Environment for Sending Test IDOCs from SAP
Sending IDocs from SAP to Neuron ESB involves some setup on SAP. This section will walk you through setting-up SAP to send a MATMAS IDOC (material master data) from SAP to Neuron ESB. The following steps assume you have some basic knowledge of SAP.
Note – These steps may vary across different versions of SAP.
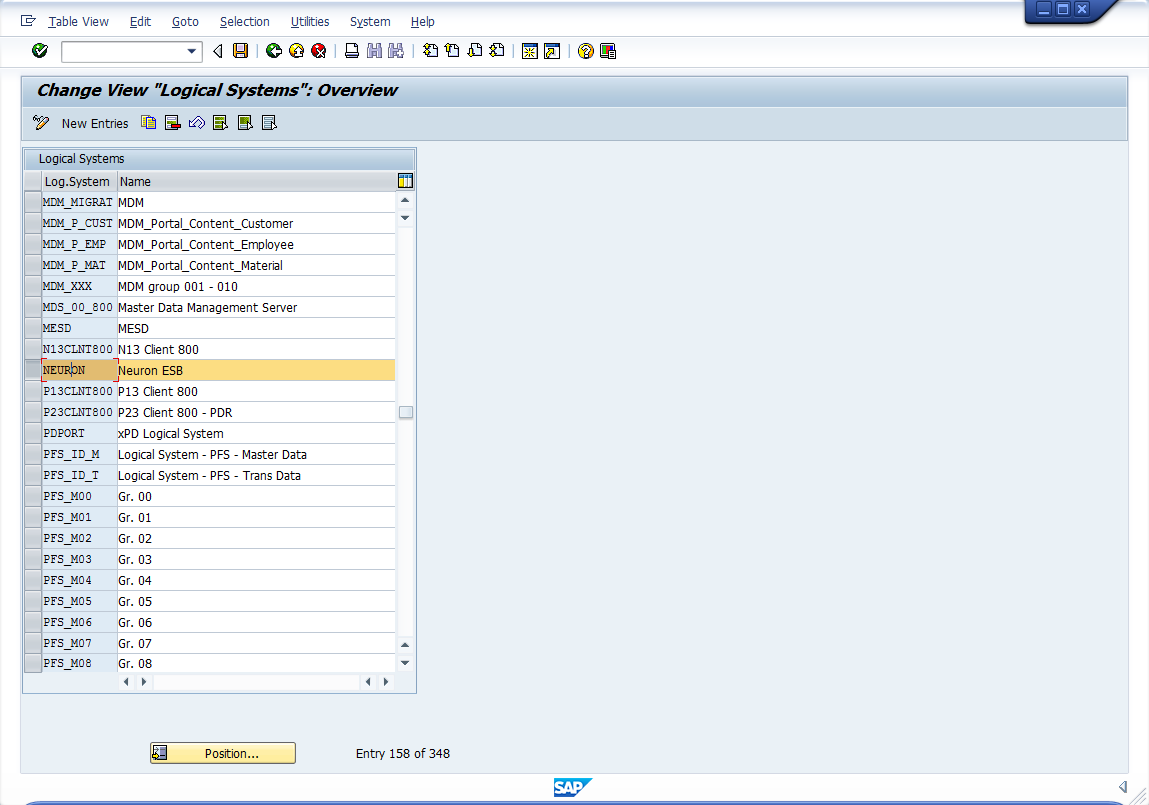
- Define a Logical System – First you need to define a logical system to which the Idocs can be sent. In the SAP GUI type in the transaction code SALE and navigate to IDoc Interface / Application Link Enabling (ALE)->Basic Settings->Logical Systems->Define Logical System. You will be notified that the table is cross-client. Click Continue. Create a new line and fill in the name of the system (e.g. NEURON) and a short description.
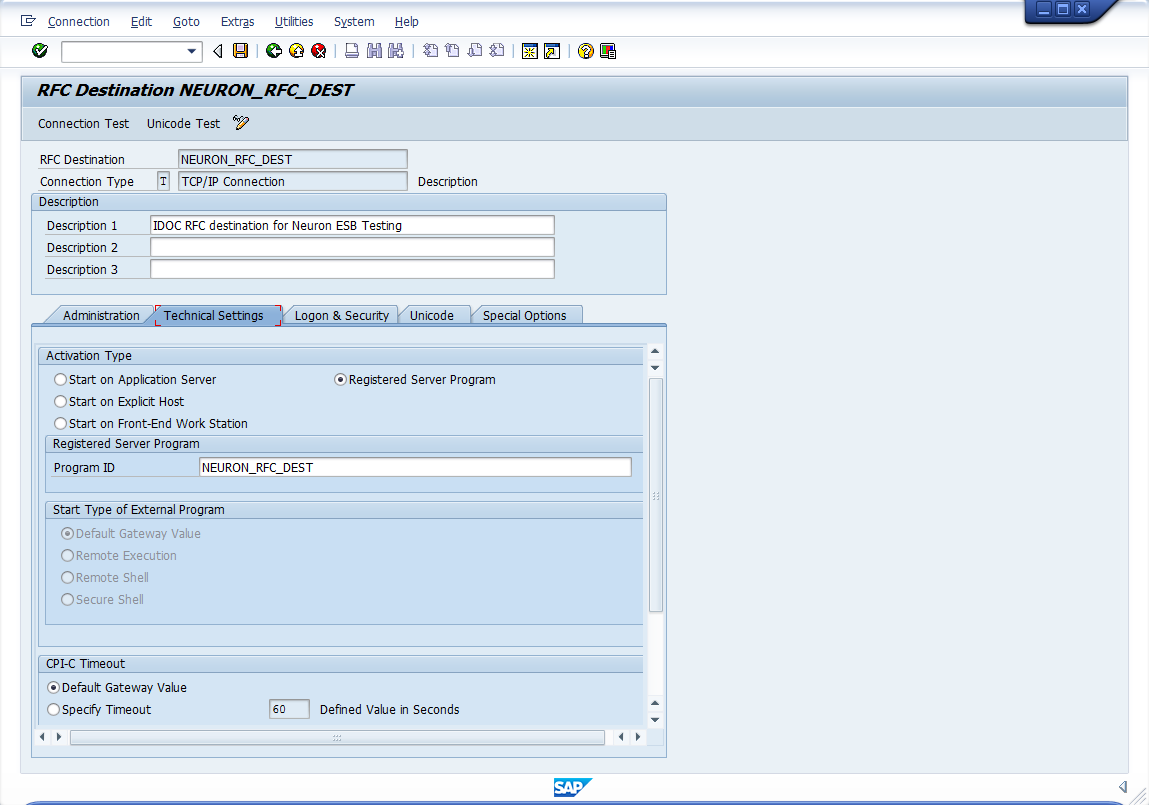
- Create an RFC Destination – To create a new destination, use transaction SM59 and click the Create button. The fields have to be filled in with following values:
- RFC Destination: (e.g. NEURON_RFC_DEST).
- Connection Type: T (for TCP/IP).
- Description 1: IDOC RFC destination for Neuron ESB Testing
- Program ID: A unique name that the server program uses to register itself on the SAP gateway (can be the same as the destination name).
- Choose option Registered Server Program.
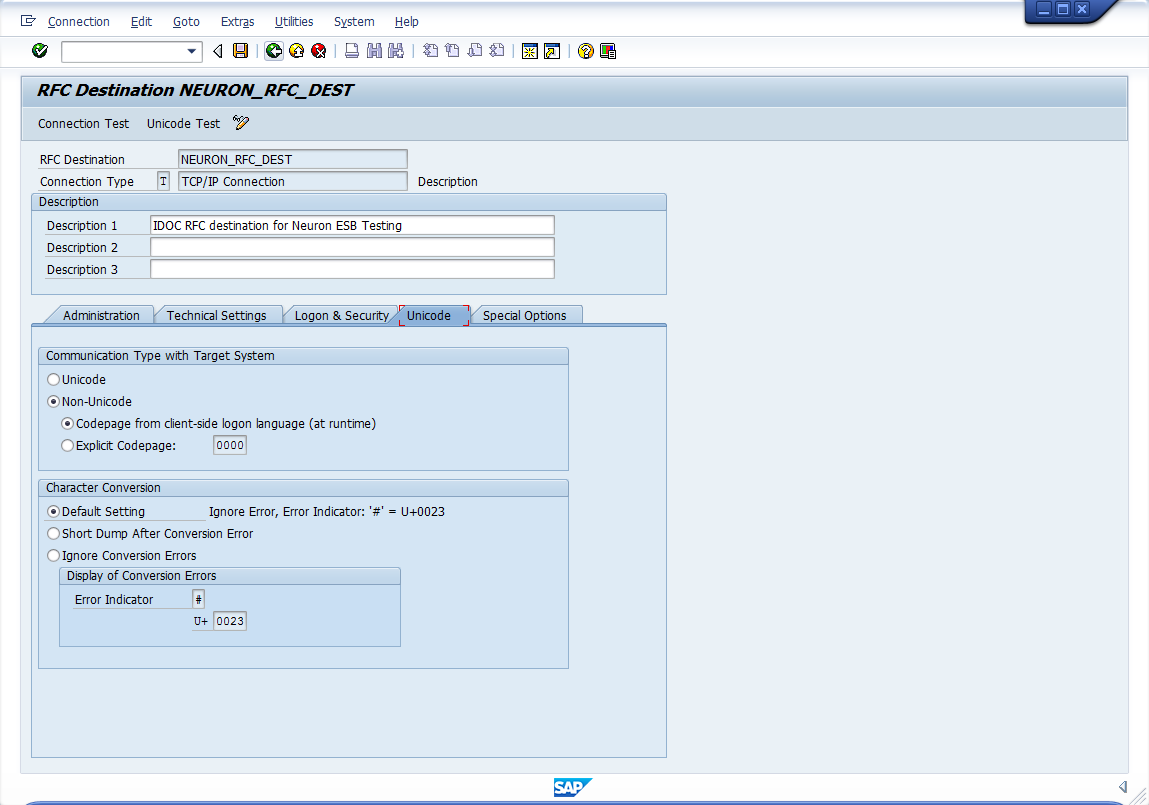
- Click on the Unicode tab and set the Communication Type with Target System to Non-Unicode and select the radio button Codepage from client-side logon language (at runtime)
- Save the RFC Destination
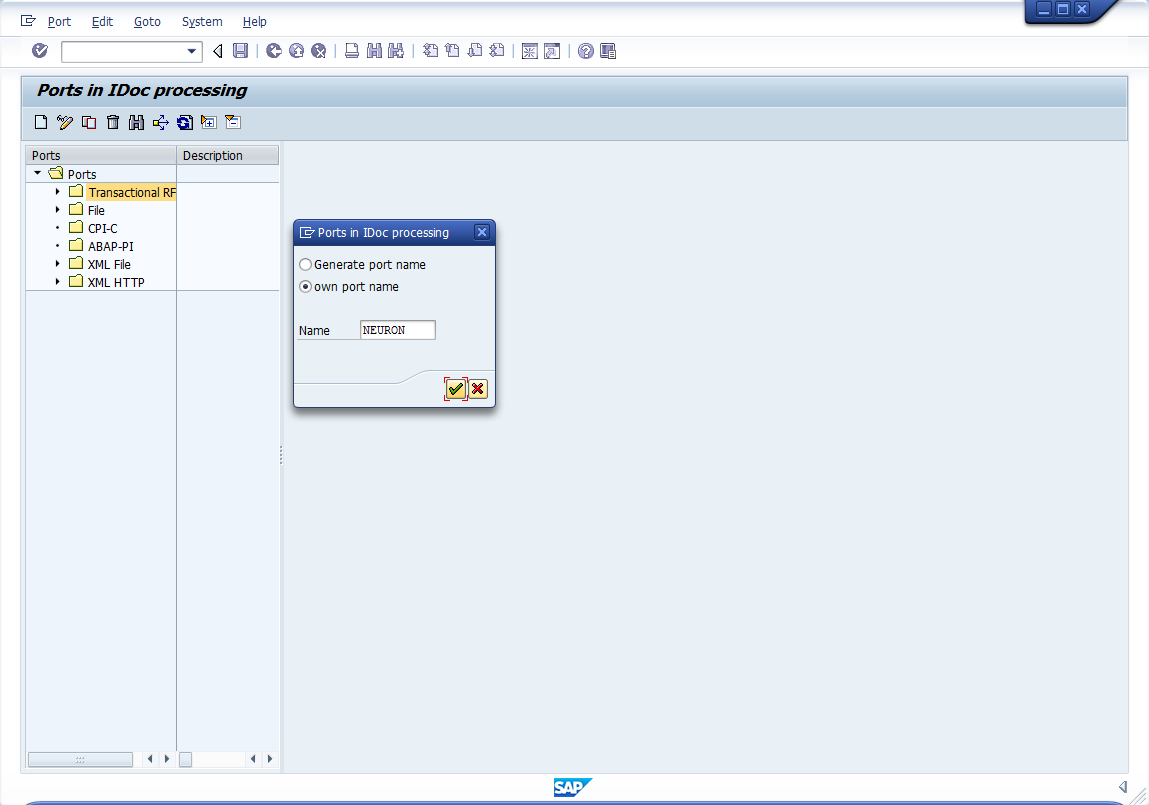
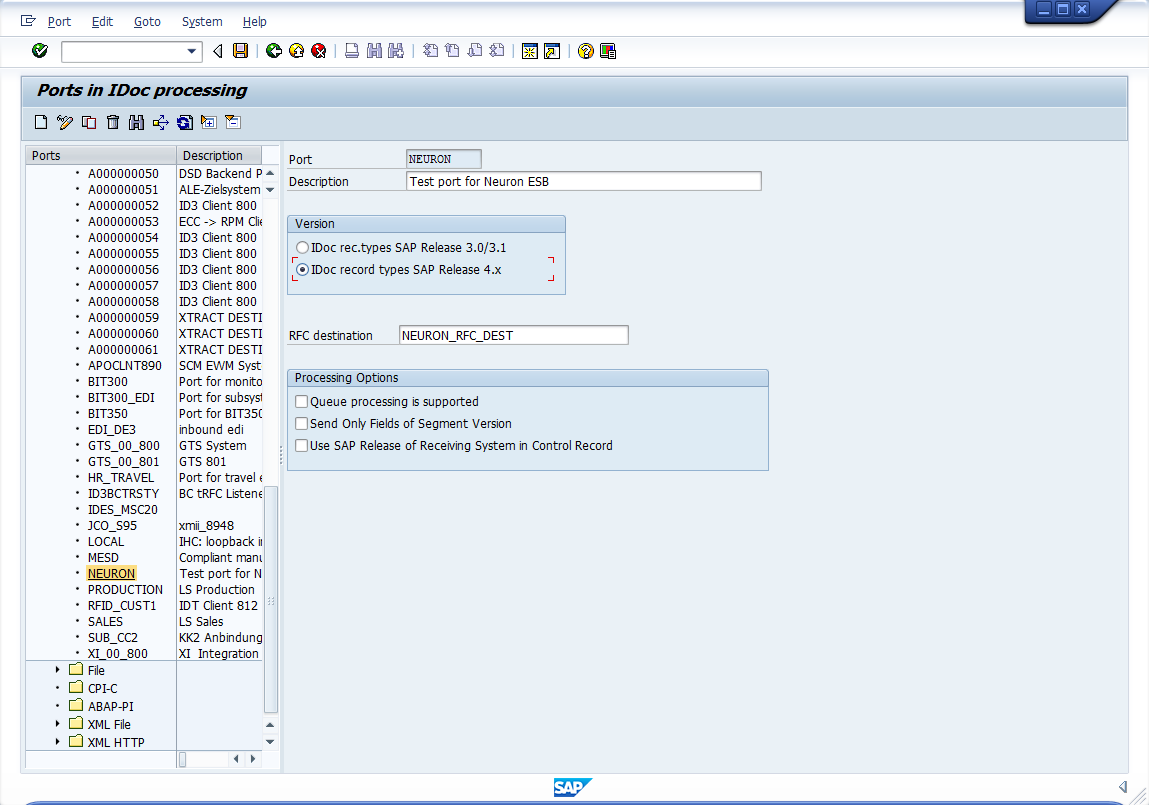
- Create an IDoc Port – Use transaction WE21 to configure an IDOC port. Select the Transaction RFC node and then click the Create button. The name of the port must be unique and refer to the RFC destination defined in step 2.
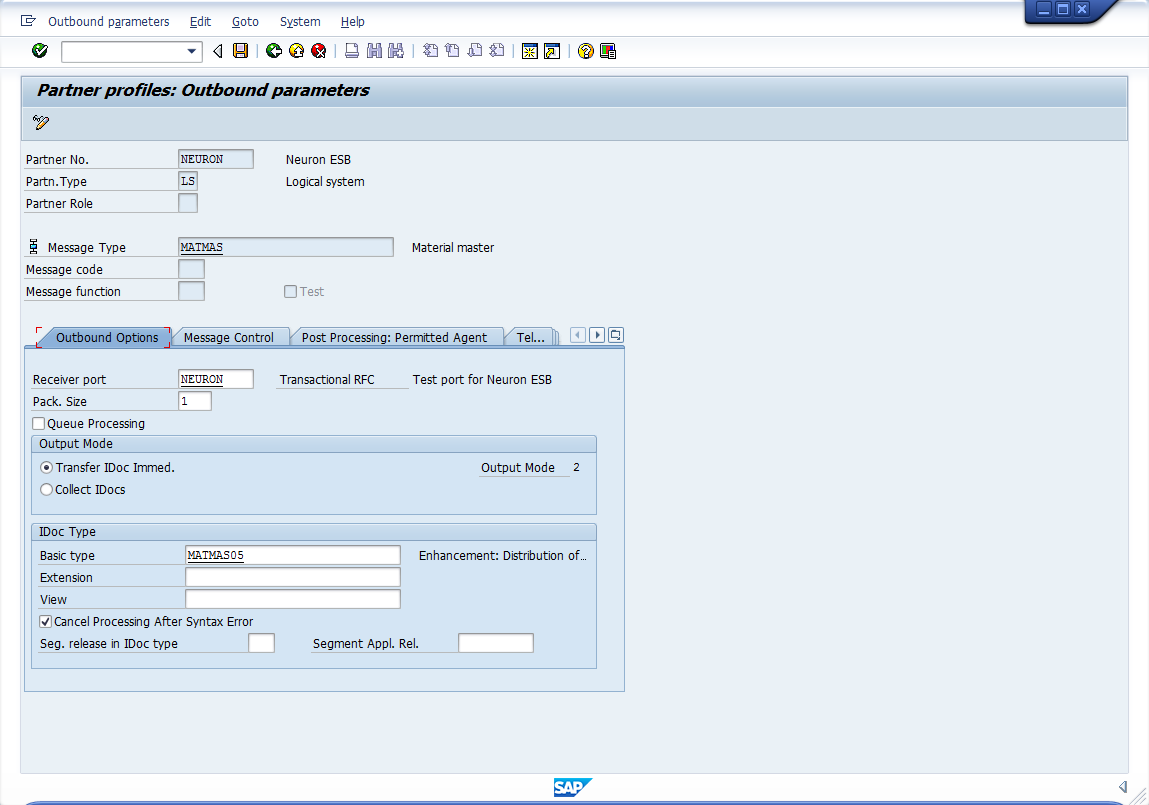
- Create a Partner Profile – Use transaction WE20 to create a new partner profile for the logical system that was created in step 1.
You also need to add one outbound parameter (use the green plus to create one). As shown in the figure below, please select MATMAS as Message type and MATMAS05 as the IDOC Basic type. You also have to define the logical Receiver port for this outbound parameter. Please fill in the name of the port created in step 3.
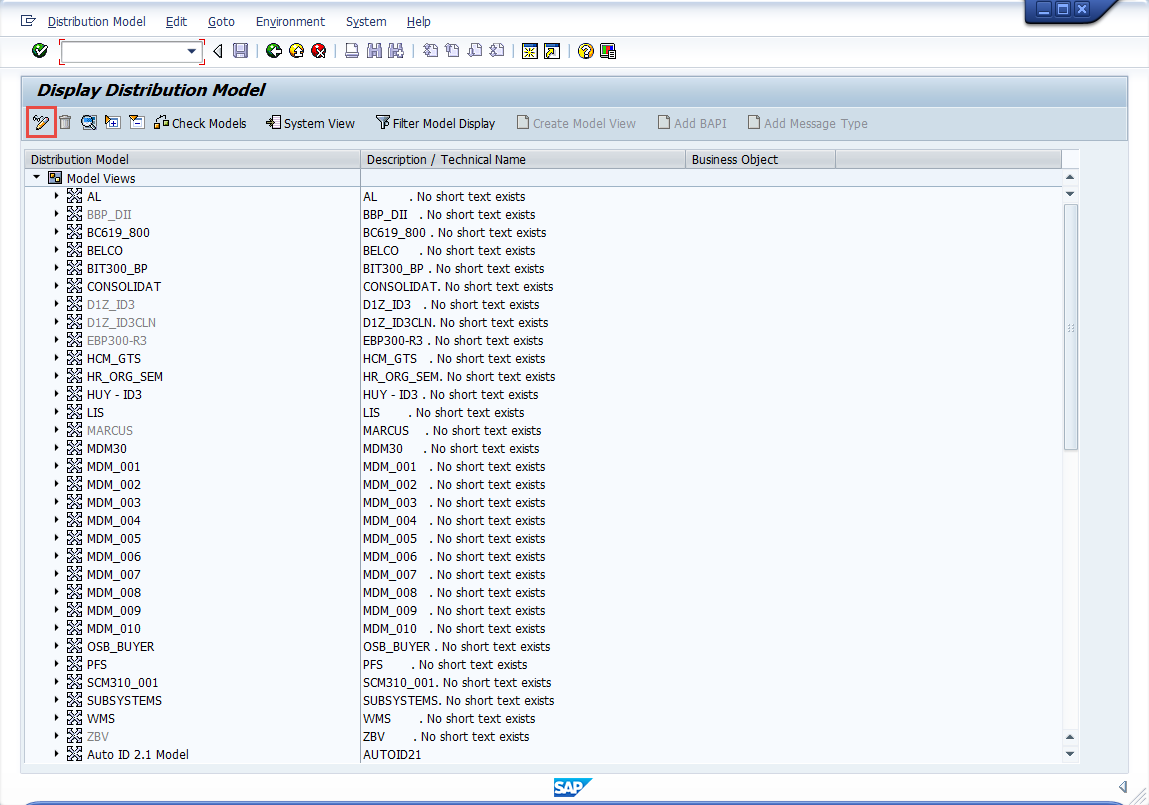
- Create a Distribution Model – Use transaction SALE, then expand Modeling and Implementing Business Processes and open Maintain Distribution Model and Distribute Views. Click the edit icon to switch into Edit mode:
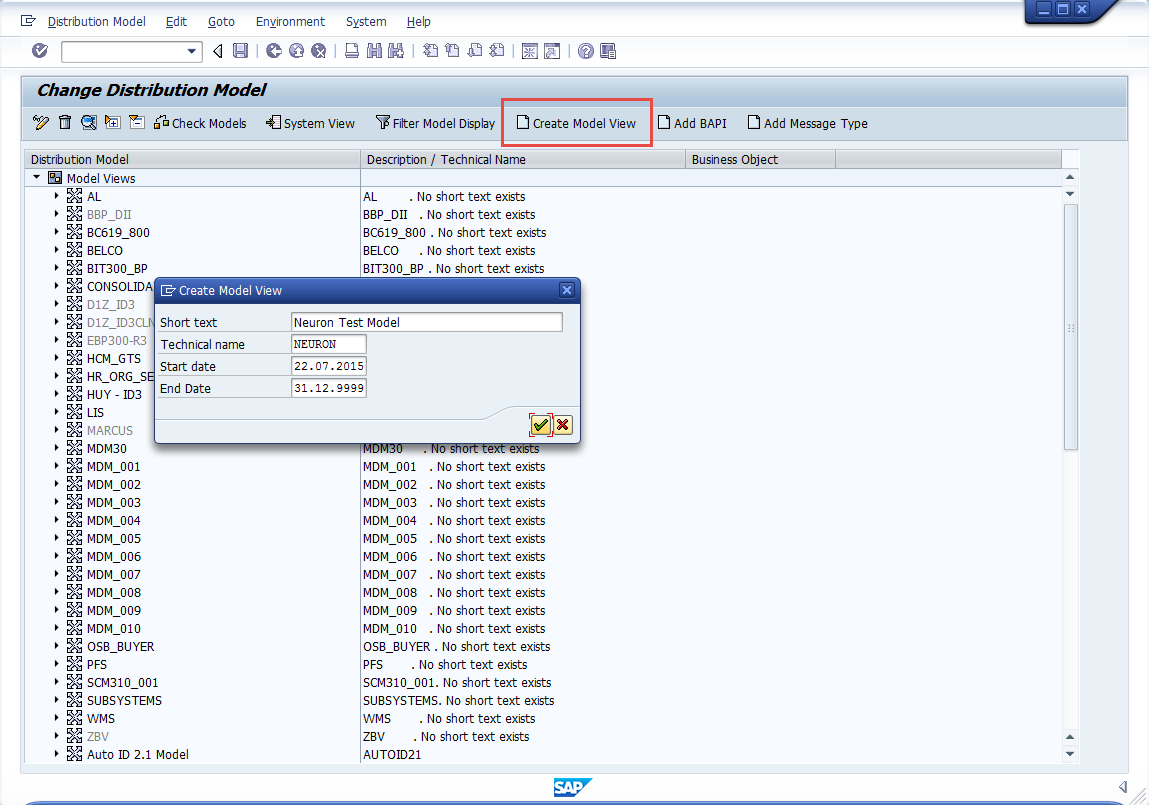
Click Create Model View and enter a Short Text and Technical Name. Click the green checkmark.
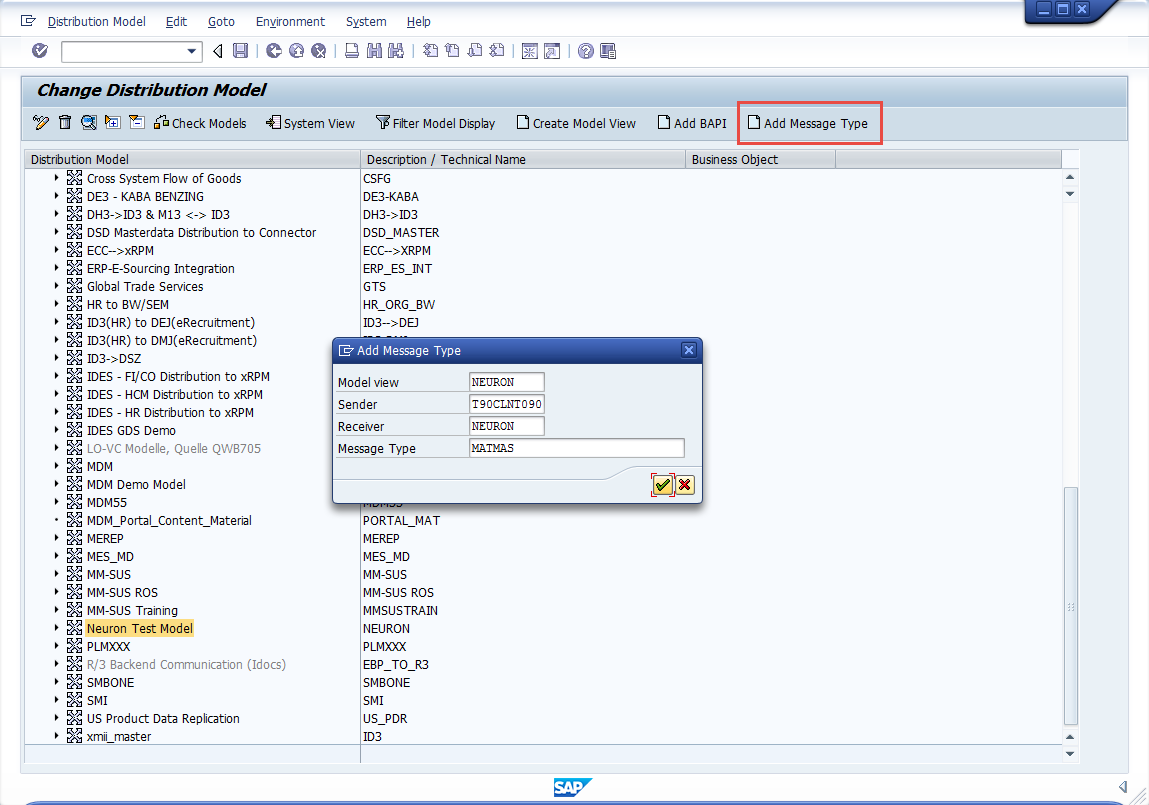
Navigate to the model you just created (i.e. Neuron Test Model) and select it. Click the Add Message Type button, and set the Model view, Sender, Receiver and Message Type. The Sender is a logical system that has been assigned to the SAP client which you are using. The Message Type is the same message type you entered for the outbound parameter in the previous step. Click the green checkmark.
You have now set-up all the necessary components to send the MATMAS05 IDOC from SAP to Neuron ESB via an RFC Destination.
Create the Neuron Listening Connector Endpoint
- In Neuron ESB Explorer, navigate to Connections->Connector Endpoints and click the New button
- Set the Name of the Connector Endpoint to SAPIDOCInboundEndpoint. This Connector Endpoint will be used to receive IDocs from SAP
- Set the Party Id to IDOCPublisher
- Set the Connector to SAPConnector
- Set the Mode to Publish
- Click on the Properties tab
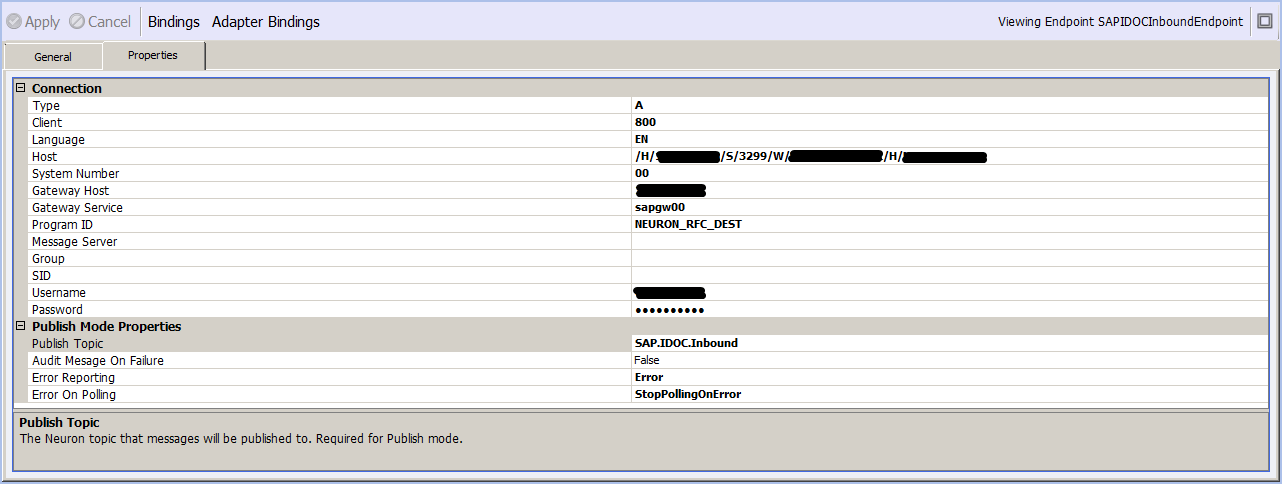
- Under the category Connection set the properties necessary for connecting to SAP. You will need all the same properties that you set in the first Connector Endpoint, plus you will need to set the Gateway Host, Gateway Service and Program ID. Also, because this is a publishing endpoint you will need to set the Publish Topic to SAP.IDOC.Inbound:
- Click the Apply button, then save the Neuron project. If the Neuron ESB service is already configured to host this solution and is currently running, the Connector Endpoint will automatically start. Check the status of the Connector Endpoint using Neuron ESB’s Endpoint Health monitor.
Test the RFC Destination from SAP
Now you can test the connection between Neuron ESB and SAP using the SAP GUI. The connection test will not be successful if the Connector Endpoint created in the previous step is either not configured correctly or is not started.
- In the SAP GUI use transaction code SM59
- Expand TCP/IP connections and double-click the RFC Destination you previously created
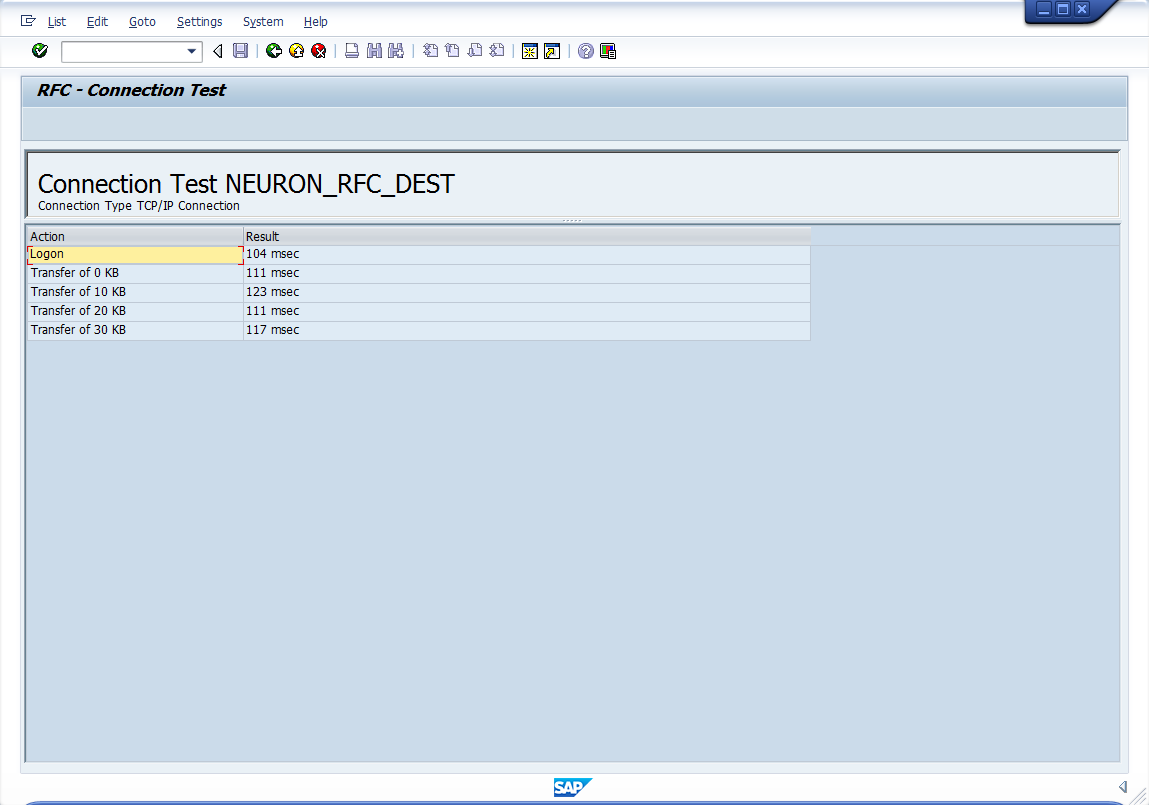
- Click the Connection Test button:
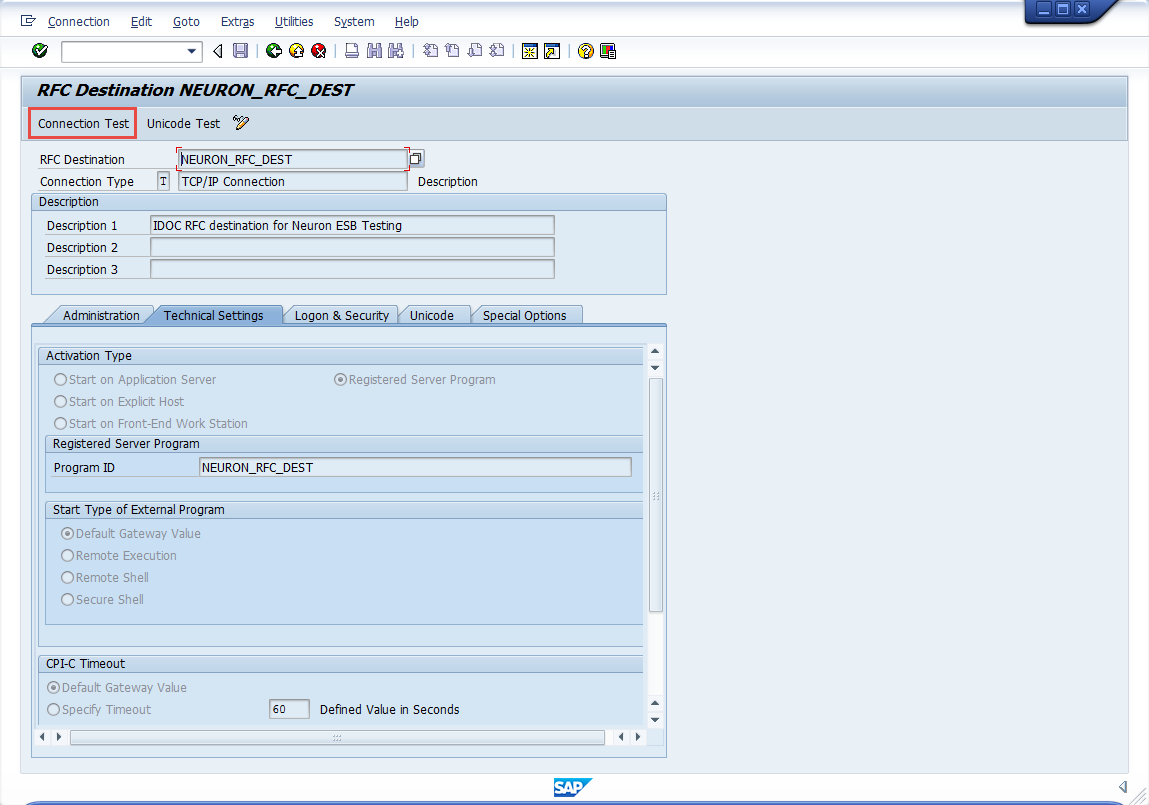
- A successful connection will look something like this:
- If you don’t have a successful connection, verify the previous steps. Also verify the SAP server can in fact reach the Neuron ESB server.
Send a Test IDOC to Neuron ESB
Now that SAP is configured to send IDocs to Neuron ESB we can send a test IDoc.
- Before sending a test IDoc you need to open the Test Client to receive it. Start the Neuron ESB Test Client from Start->All Programs->Neudesic->Neuron ESB V3 (<instance name>)->Neuron Test Client.
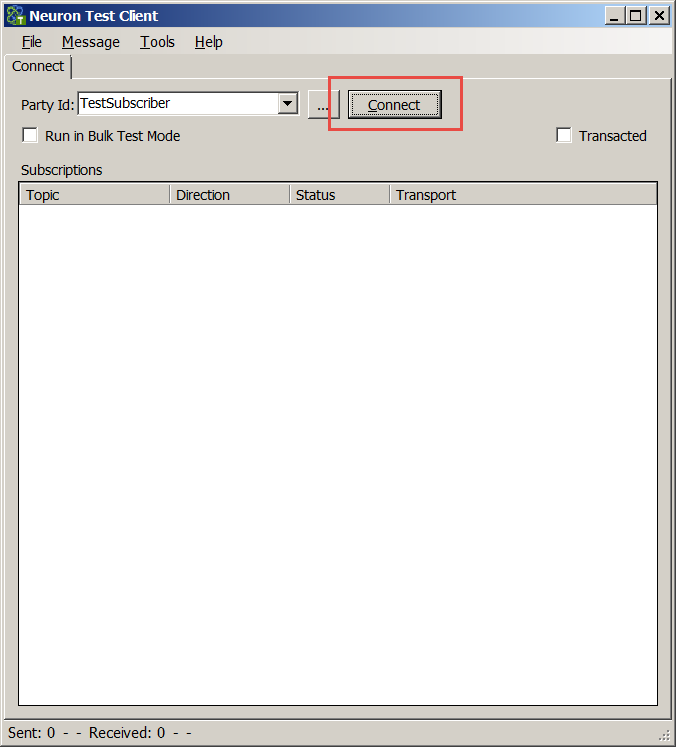
- In the Test Client select TestSubscriber as the Party Id and click the Connect button:
- Navigate to the Receive tab.
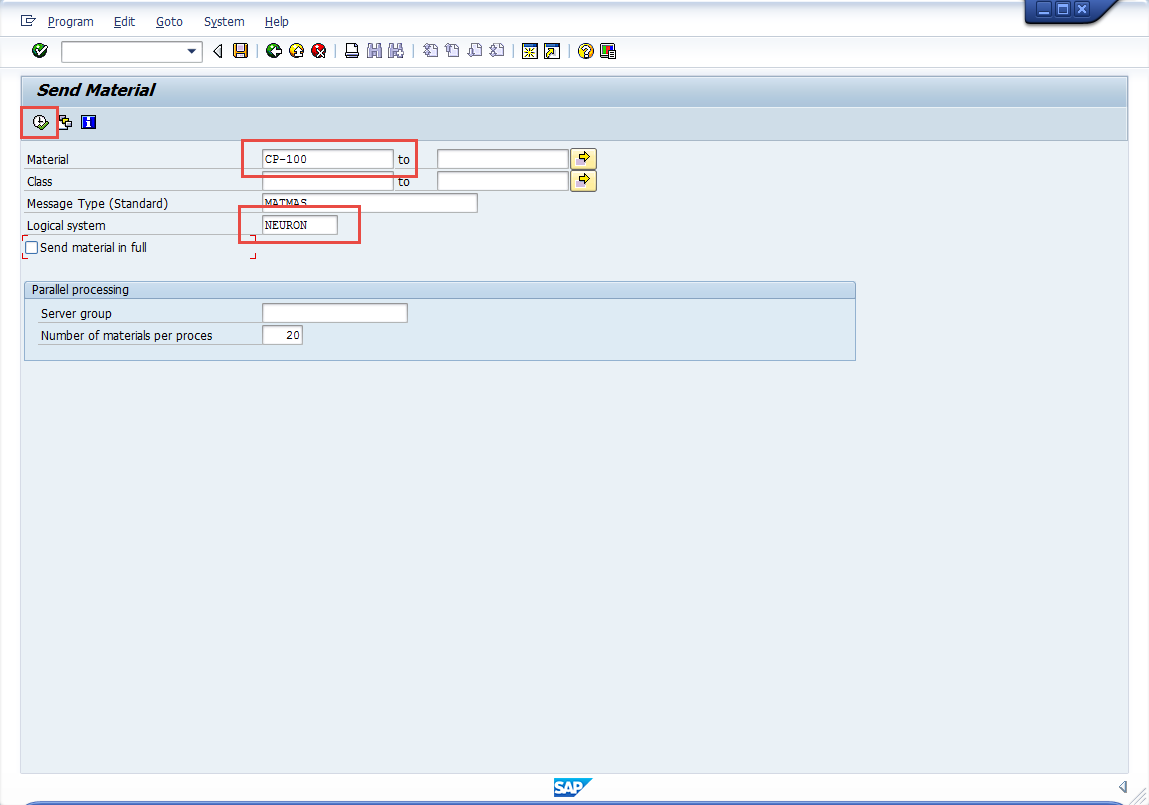
- In the SAP GUI, use transaction BD10 to send a test IDoc for a specified material number. Before you run the program (F8) you have to fill in the logical system as shown in the figure below.
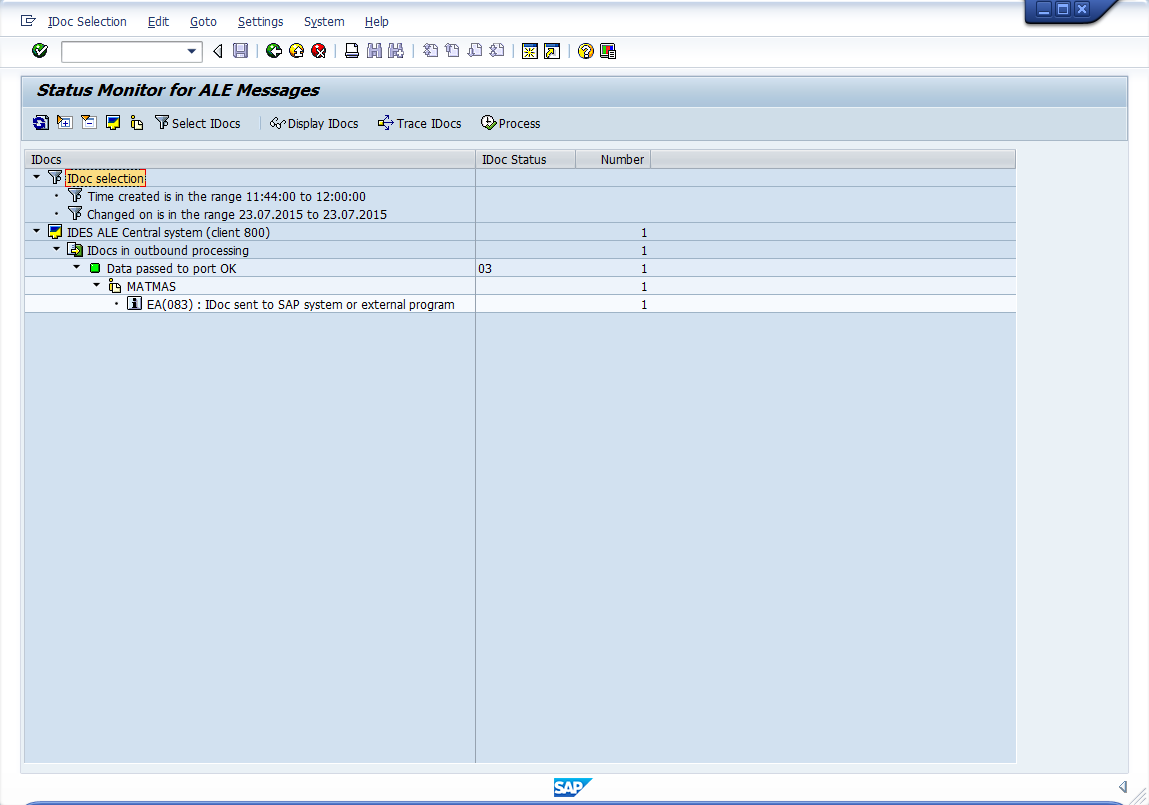
- To check the status of the IDOC, use transaction code BD87. The default values in the Select IDocs screen will display all IDocs sent today. Click the execute button to see the list.
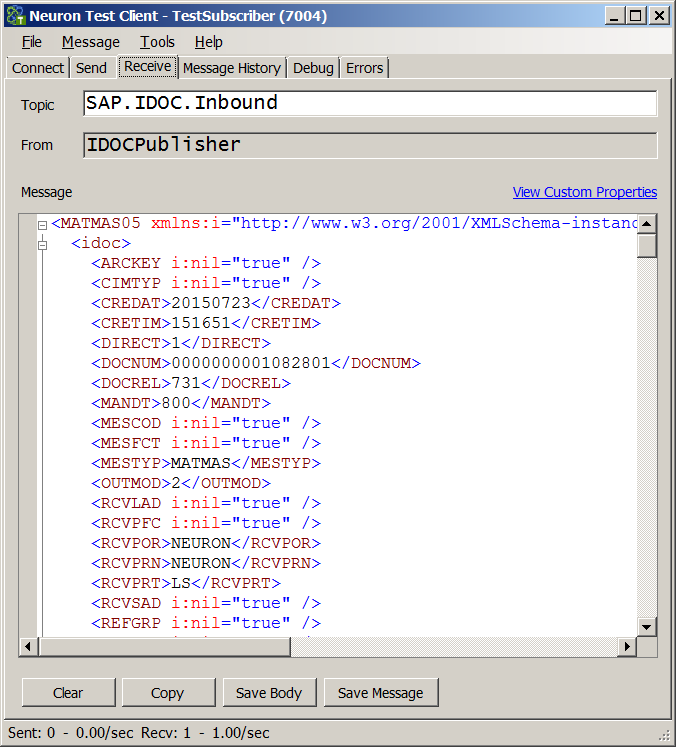
- You should also see the received IDoc in the Neuron ESB Test Client:
- Save this message! You’ll need the DOCNUM for Part 4 of this series.
To see how to send IDocs to SAP, check out the fourth part of this series – Using the Neuron ESB SAP Connector – Part 4: Sending IDocs
Read more about Peregrine Connect
-
Rabbit MQ Topics
Introduction Due to the open-source nature of RabbitMQ and constant updates, it is...
-
Port Sharing
One of Neuron ESB’s scalability features is the ability to install multiple...
-
The Integration Journey to...
The Integration Journey to Digital Transformation with Peregrine Connect
-
Saving Time and Money by...
Neuron ESB Application Integration and Web Service Platform: A Real-World Example...
-
Neo PLM
-
Loomis Case Study
Loomis Chooses Peregrine Connect as Their No/Low-Code Integration Platform:...
-
Decision Test Data Mapping
- Use decisions to drive the execution of...
-
Map Testing
Learn how to utilize FlightPath's testing functions...
