Business Process Tutorial
- Home
- Neuron ESB
- Development
- Developing Neuron Applications
- Developing Business Processes
- Business Process Tutorial
Overview
This tutorial will walk you through building your first Neuron ESB Business Process. It will demonstrate how to create a new Business Process, adding and configuring a few Process Steps, and testing the Business Process using the Business Process Designer design-time testing facilities as well as a runtime test using the Neuron ESB Test Client.
The Business Process you will develop implements a simple message validation transformation pattern, two of the components in the VETO pattern (Validate, Enrich, Transform and Operate).
Create a Neuron Business Process
- To create a Neuron ESB Business Process, navigate to the Processes tab in the Neuron ESB Explorer navigation area:

- Click on the New button and select Create Process:

- On the newly created Business Process, select the execution block in the middle of the designer. The Business Process properties will appear in the lower-right corner of Neuron ESB Explorer. Change the Name property of the Process to VETO Pattern:

Add and Configure the Validate Schema Step
Click here for more information on the Validate Schema Step.
- In the Process Steps library in the upper-right corner, type val in the Search Steps area. This will limit the steps shown to those that match the search string:

- Click on the Validate Schema step and drag it into the execution block on the design surface:

- As shown in Figure 5, click on the Schema step, and then click on the ellipsis () button that is displayed when you click on the Schemas property. The Schemas Collection Editor will display. This is where you can enter all of the schemas you want the message to validate against.

- In the Schemas Collection Editor, click the Add button, then select the XmlSchema property and click on the ellipsis button:

- Copy the schema below and paste it into the XSD Document editor:
<?xml version="1.0" encoding="UTF-8"?>
<xs:schema xmlns:xs="https://www.w3.org/2001/XMLSchema">
	<xs:element name="book">
		<xs:complexType>
			<xs:sequence>
				<xs:element name="title" type="xs:string"></xs:element>
				<xs:element name="author" type="xs:string"></xs:element>
				<xs:element maxOccurs="unbounded" minOccurs="0" name="character">
					<xs:complexType>
						<xs:sequence>
							<xs:element name="name" type="xs:string"></xs:element>
							<xs:element maxOccurs="unbounded" minOccurs="0" name="friend-of" type="xs:string"></xs:element>
							<xs:element name="since" type="xs:date"></xs:element>
							<xs:element name="qualification" type="xs:string"></xs:element>
						</xs:sequence>
					</xs:complexType>
				</xs:element>
			</xs:sequence>
			<xs:attribute name="isbn" type="xs:string"></xs:attribute>
		</xs:complexType>
	</xs:element>
</xs:schema>
- The XSD Document editor should look like this:

- Click OK on the XSD Document Editor and then click OK again on the Schemas Collection Editor.
NOTE: As an alternative to selecting a Schema file from disk or copying a Schema into the editor, XSD Schemas can be stored in the Neuron ESB Schema Repository and then be selected in the Schema Names drop down box in the property grid.
Add and Configure the Transform XSLT Step
Click here for more information on the Transform XSLT Step.
- Next, we will configure the Valid branch of the Schema step. In the Process Steps Library, find the Transform XSLT step and drag it onto the Designer surface, into the Valid branch of the Validate Schema step:

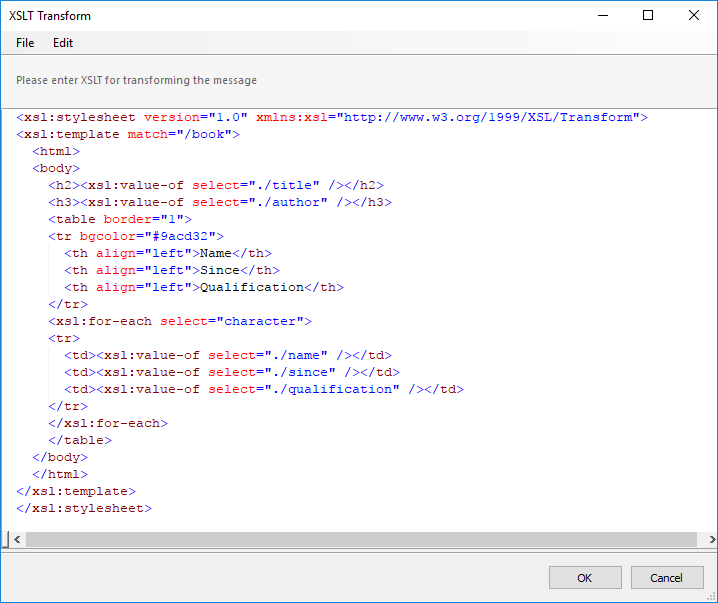
- As shown in Figure 9, click on the Transform step, and then click on the ellipsis button that is displayed when you click on the XSLT Document property. The XSLT Transform Editor will display. Copy the XSLT below and paste it into the XSLT Transform Editor:
<xsl:stylesheet version="1.0" xmlns:xsl="https://www.w3.org/1999/XSL/Transform">
	<xsl:template match="/book">
		<html>
			<body>
				<h2>
					<xsl:value-of select="./title"></xsl:value-of>
				</h2>
				<h3>
					<xsl:value-of select="./author"></xsl:value-of>
				</h3>
				<table border="1">
					<tr bgcolor="#9acd32">
						<th align="left">Name</th>
						<th align="left">Since</th>
						<th align="left">Qualification</th>
					</tr>
					<xsl:for-each select="character">
						<tr>
							<td>
								<xsl:value-of select="./name"></xsl:value-of>
							</td>
							<td>
								<xsl:value-of select="./since"></xsl:value-of>
							</td>
							<td>
								<xsl:value-of select="./qualification"></xsl:value-of>
							</td>
						</tr>
					</xsl:for-each>
				</table>
			</body>
		</html>
	</xsl:template>
</xsl:stylesheet>
- The XSLT Transform editor should look like this:

NOTE: As an alternative to selecting an XSLT file from disk or copying a XSLT document into the editor, XSLT documents can be stored in the Neuron ESB Schema Repository and then be selected in the XSLT Name drop down box in the property grid.
- Click OK on the XSLT Transform editor.
- Next, in the Process Steps Library, find the Trace step and drag it onto the designer surface, after the Transform XSLT step:

Add and Configure the C# Step
Click here for more information on the C# Step.
- Now we will configure the Invalid branch of the Validate Schema step. In the Process Steps Library, find the C# step and drag it into the Invalid branch of the Validate Schema step, before the Cancel step that is already there:

- As shown in Figure 12, click on the C# step, and change the Name property to Trace Exception. To edit the code for the C# step, either double-click on the C# step or right-click and select Edit Code The code editor will open. Copy the code below and paste it into the editor. Whenever a message fails validation, it enters the Invalid branch and a CurrentException is saved as a context property. The code below will retrieve that exception and Trace it to the Trace Window (at design time) or the Neuron application logs (at run time).
//get the current exception
Exception ex = (Exception)context.Properties["CurrentException"];
string msg = "Validation Exception: ";
if(ex.InnerException != null)
{
	msg += ex.InnerException.Message;
}
else
{
	msg += ex.Message;
}
//trace to designer window
context.Instance.TraceError(msg);
- The C# code editor should look like this:

- Click the Save button in the code editor (in red in Figure 13).
Testing the Business Process
The Neuron ESB Process Designer includes a Test Utility. You will use it to test the business process we just created.
- If you have multiple tabs open in the process designer, navigate to the VETO Pattern tab. Click the Test Process button:

- You may see a Warning message that states the ESB Service is not configured. This process does not require the ESB service to be configured. Click Yes.
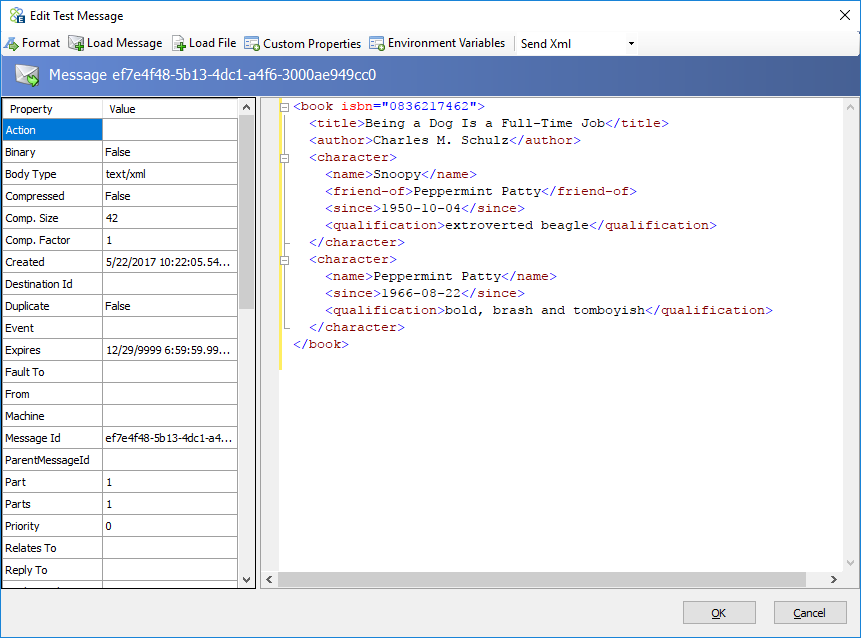
- The Edit Test Message dialog will appear. Copy the XML below and paste it into the text box.
<book isbn="0836217462">
	<title>Being a Dog Is a Full-Time Job</title>
	<author>Charles M. Schulz</author>
	<character>
		<name>Snoopy</name>
		<friend-of>Peppermint Patty</friend-of>
		<since>1950-10-04</since>
		<qualification>extroverted beagle</qualification>
	</character>
	<character>
		<name>Peppermint Patty</name>
		<since>1966-08-22</since>
		<qualification>bold, brash and tomboyish</qualification>
	</character>
</book>
- The Edit Test Message dialog should look like this:

- Click the OK button. The process tester will navigate through each step, highlighting the current step in green as it progresses. The Trace step will output the results of the current Neuron ESB Message to the Trace Window:

- To test the Invalid branch of the Validate Schema step, run the Process Tester again using the XML below. Notice the difference between this XML and the XML previously used (the name element is missing):
<book isbn="0836217462">
	<title>Being a Dog Is a Full-Time Job</title>
	<author>Charles M. Schulz</author>
	<character>
		<friend-of>Peppermint Patty</friend-of>
		<since>1950-10-04</since>
		<qualification>extroverted beagle</qualification>
	</character>
	<character>
		<since>1966-08-22</since>
		<qualification>bold, brash and tomboyish</qualification>
	</character>
</book>
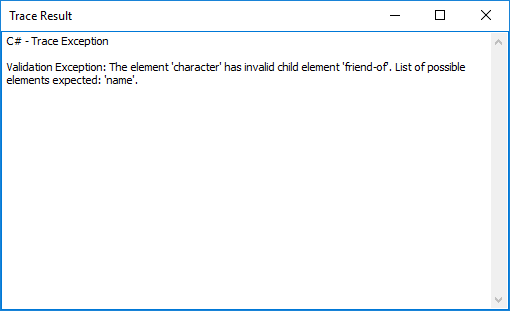
- This time the Trace Window displays an exception:

- To see the entire exception, double-click on the row in the Trace Window:
